Unlock Irresistible Sweet & Salty Bliss: Your 4-Ingredient No-Churn Sea Salt Ice Cream
Imagine a scorching summer day, the kind where only the coolest, creamiest indulgence can truly satisfy. Now picture a dessert that doesn't just cool you down but also tantalizes your taste buds with an extraordinary balance of sweet and salty. Enter Why Sea Salt Ice Cream Is the Sweet & Salty Treat Everyone Loves, a gourmet sensation that has captured hearts globally, and guess what? You can whip up this dreamy confection right in your own kitchen with just four simple ingredients and *no ice cream maker required!* For years, the thought of homemade ice cream might have conjured images of complex machinery, constant churning, or delicate custards involving egg yolks and heating. But prepare to have your dessert world transformed. Our recipe for no-churn sea salt ice cream is designed for effortless elegance, promising a luxuriously smooth, rich, and utterly delightful experience that will undoubtedly become your new go-to frozen treat. Get ready to turn "meh" into "mmm!" with every scoop of this irresistible homemade delight.The Culinary Magic Behind No-Churn Sea Salt Ice Cream
Have you ever wondered how an ice cream can be so incredibly creamy without the traditional churning process? The secret lies in a brilliant combination of basic ingredients and a simple technique that eliminates the need for any special equipment. This approach isn't just about convenience; it's about achieving that coveted velvety texture and profound flavor profile with minimal fuss. Traditional ice cream often relies on churning to break up ice crystals as they form, resulting in a smooth product. Our no-churn method bypasses this by leveraging the properties of two key ingredients: heavy whipping cream and sweetened condensed milk. When heavy cream is whipped to stiff peaks, it incorporates a significant amount of air, creating a light, airy base that mimics the volume achieved by churning. Sweetened condensed milk, on the other hand, is a miracle worker. Its high sugar content and thick consistency not only provide the perfect level of sweetness but also significantly lower the freezing point of the mixture. This discourages the formation of large ice crystals, ensuring your homemade sea salt ice cream remains wonderfully smooth and scoopable, much like a gourmet shop's offering. The result? A perfectly sweet and salty dessert that melts in your mouth, leaving a truly satisfying finish.Gather Your Four Essential Ingredients for Sea Salt Ice Cream Perfection
The beauty of this recipe lies in its simplicity. You won't need a pantry full of exotic items; just four readily available ingredients are all it takes to create your own gourmet no-churn sea salt ice cream. Each plays a crucial role in achieving that perfect balance of flavor and texture. 1. Heavy Whipping Cream (or Heavy Cream): This is the foundation of your ice cream's luxurious texture. With its high-fat content (typically 36% or more), heavy cream whips up beautifully, incorporating air to create a light, voluminous base. This whipped cream provides the richness and smooth mouthfeel that defines an exceptional ice cream, making each bite incredibly satisfying. 2. Sweetened Condensed Milk: This sweet, thick, and syrupy ingredient is a dual threat. It delivers the necessary sweetness without the need for additional sugar and, more importantly, it's key to achieving that velvety consistency characteristic of no-churn ice cream. It helps prevent ice crystals, ensuring a smooth, delightful texture that would typically require an ice cream maker. 3. Sea Salt: The star of the show! High-quality sea salt is what transforms this from a simple vanilla ice cream into the extraordinary treat we crave. Its distinct savory notes beautifully balance the sweetness, creating a complex flavor profile that is utterly addictive. Whether you use fine sea salt for an even distribution or a flakier variety for subtle bursts of saltiness, it's the ingredient that truly makes this *sea salt ice cream*. A little goes a long way, enhancing all the other flavors. 4. Pure Vanilla Extract: Rounding out the flavor profile, pure vanilla extract adds a warm, comforting, and aromatic depth to the ice cream. It complements the sweetness, harmonizes with the sea salt, and provides that classic, inviting scent that makes any homemade dessert feel special. Don't skimp on good quality vanilla; it makes a difference!Step-by-Step Guide to Crafting Your Dreamy No-Churn Sea Salt Ice Cream
Ready to dive into the easy process? Here's how you'll transform these simple ingredients into a gourmet frozen delight without an ice cream maker, egg yolks, or any heating involved!1. Prep for Success: Chill Your Tools
For the best results, place your large mixing bowl (preferably metal) and whisk attachments (if using an electric mixer) in the freezer for 15-20 minutes before you begin. A cold bowl helps the heavy cream whip faster and achieve stiffer peaks, contributing to that desired creamy texture.
2. Whip the Heavy Cream to Velvety Peaks
Pour the cold heavy whipping cream into your chilled bowl. Using an electric hand mixer or stand mixer fitted with the whisk attachment, beat the cream on medium-high speed until it forms stiff peaks. This means when you lift the whisk, the peaks hold their shape firmly. Be careful not to over-whip, or it could turn grainy.
3. Gently Fold in Sweetness and Flavor
In a separate bowl, combine the sweetened condensed milk and pure vanilla extract. Mix them until well combined. Now, carefully fold this mixture into the whipped cream. The key here is *gentle* folding to maintain as much of the air as possible that you just whipped into the cream. Use a spatula to scoop from the bottom and fold over the top until just combined, ensuring no streaks remain.
4. Introduce the Star: Sea Salt and Optional Ocean Hues
Add most of your sea salt (reserving a pinch for garnish) to the mixture and gently fold it in. This is also the stage where you can add a few drops of blue or turquoise food coloring if you desire that beautiful, ocean-wave aesthetic. Remember, the color is purely for visual appeal and can be skipped if you prefer a more natural appearance. Swirl it gently to create a lovely marbling effect or mix thoroughly for a uniform hue.
5. Freeze for Fabulousness
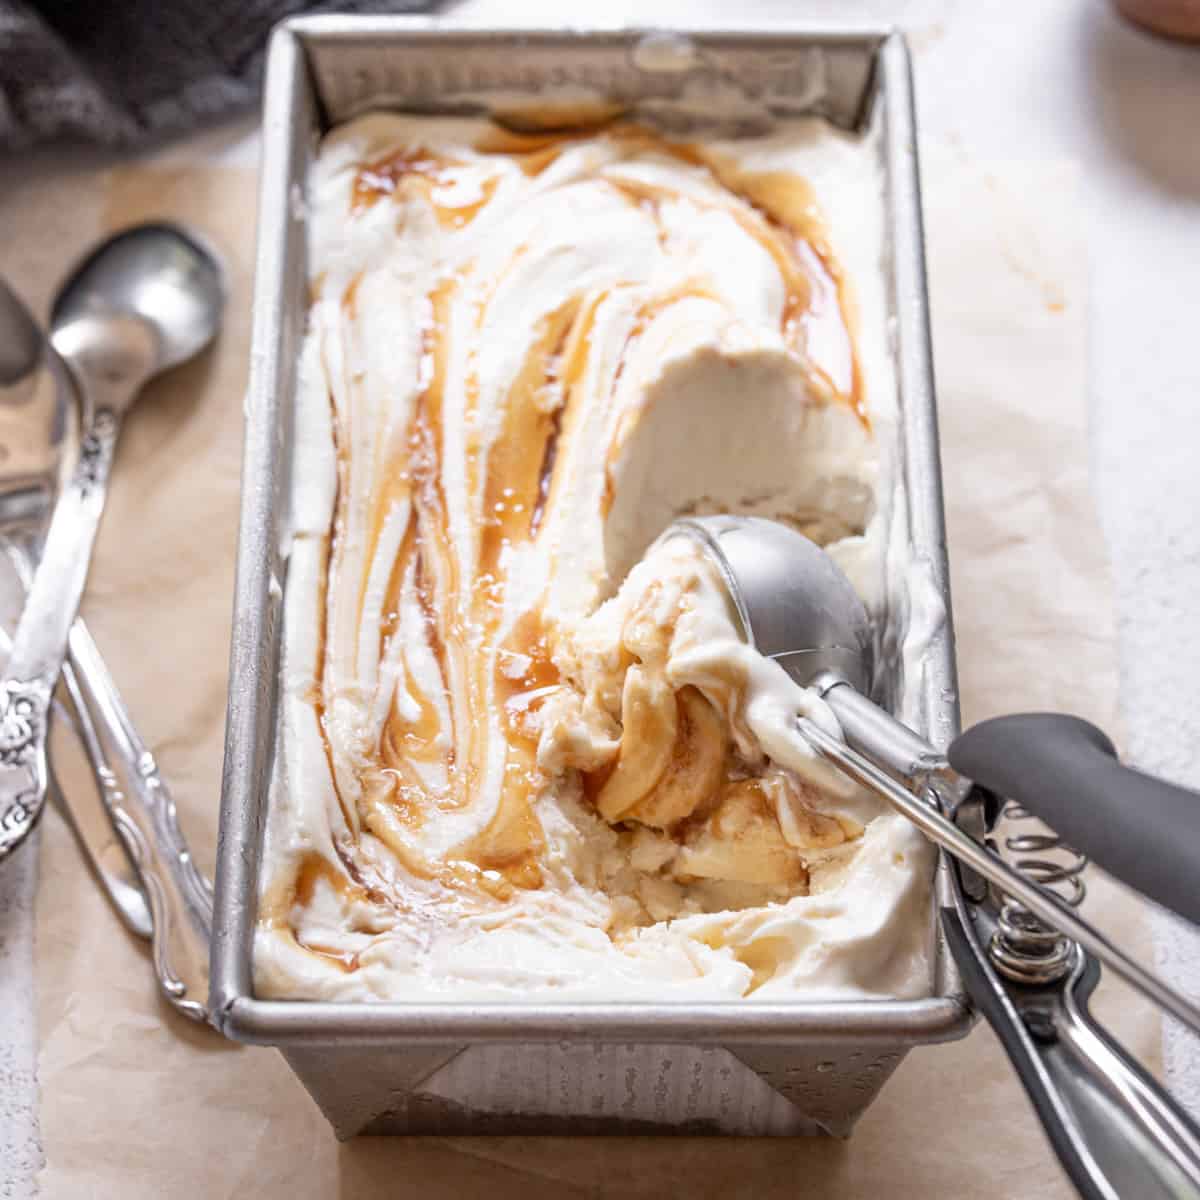
Transfer your glorious ice cream mixture into a freezer-safe container. A loaf pan covered tightly with plastic wrap or an airtight container works perfectly. For an extra touch, sprinkle the reserved pinch of sea salt on top before freezing. Place it in the freezer for at least 6-8 hours, or ideally overnight, until it's firm and scoopable. Patience is a virtue here!
6. Scoop, Serve, and Savor
Once fully frozen, allow your homemade no-churn sea salt ice cream to sit at room temperature for a few minutes before scooping. This will make it easier to serve. Dive in and enjoy the irresistible combination of sweet and salty!
